
Your Public Portal: One Link for Every Online Service
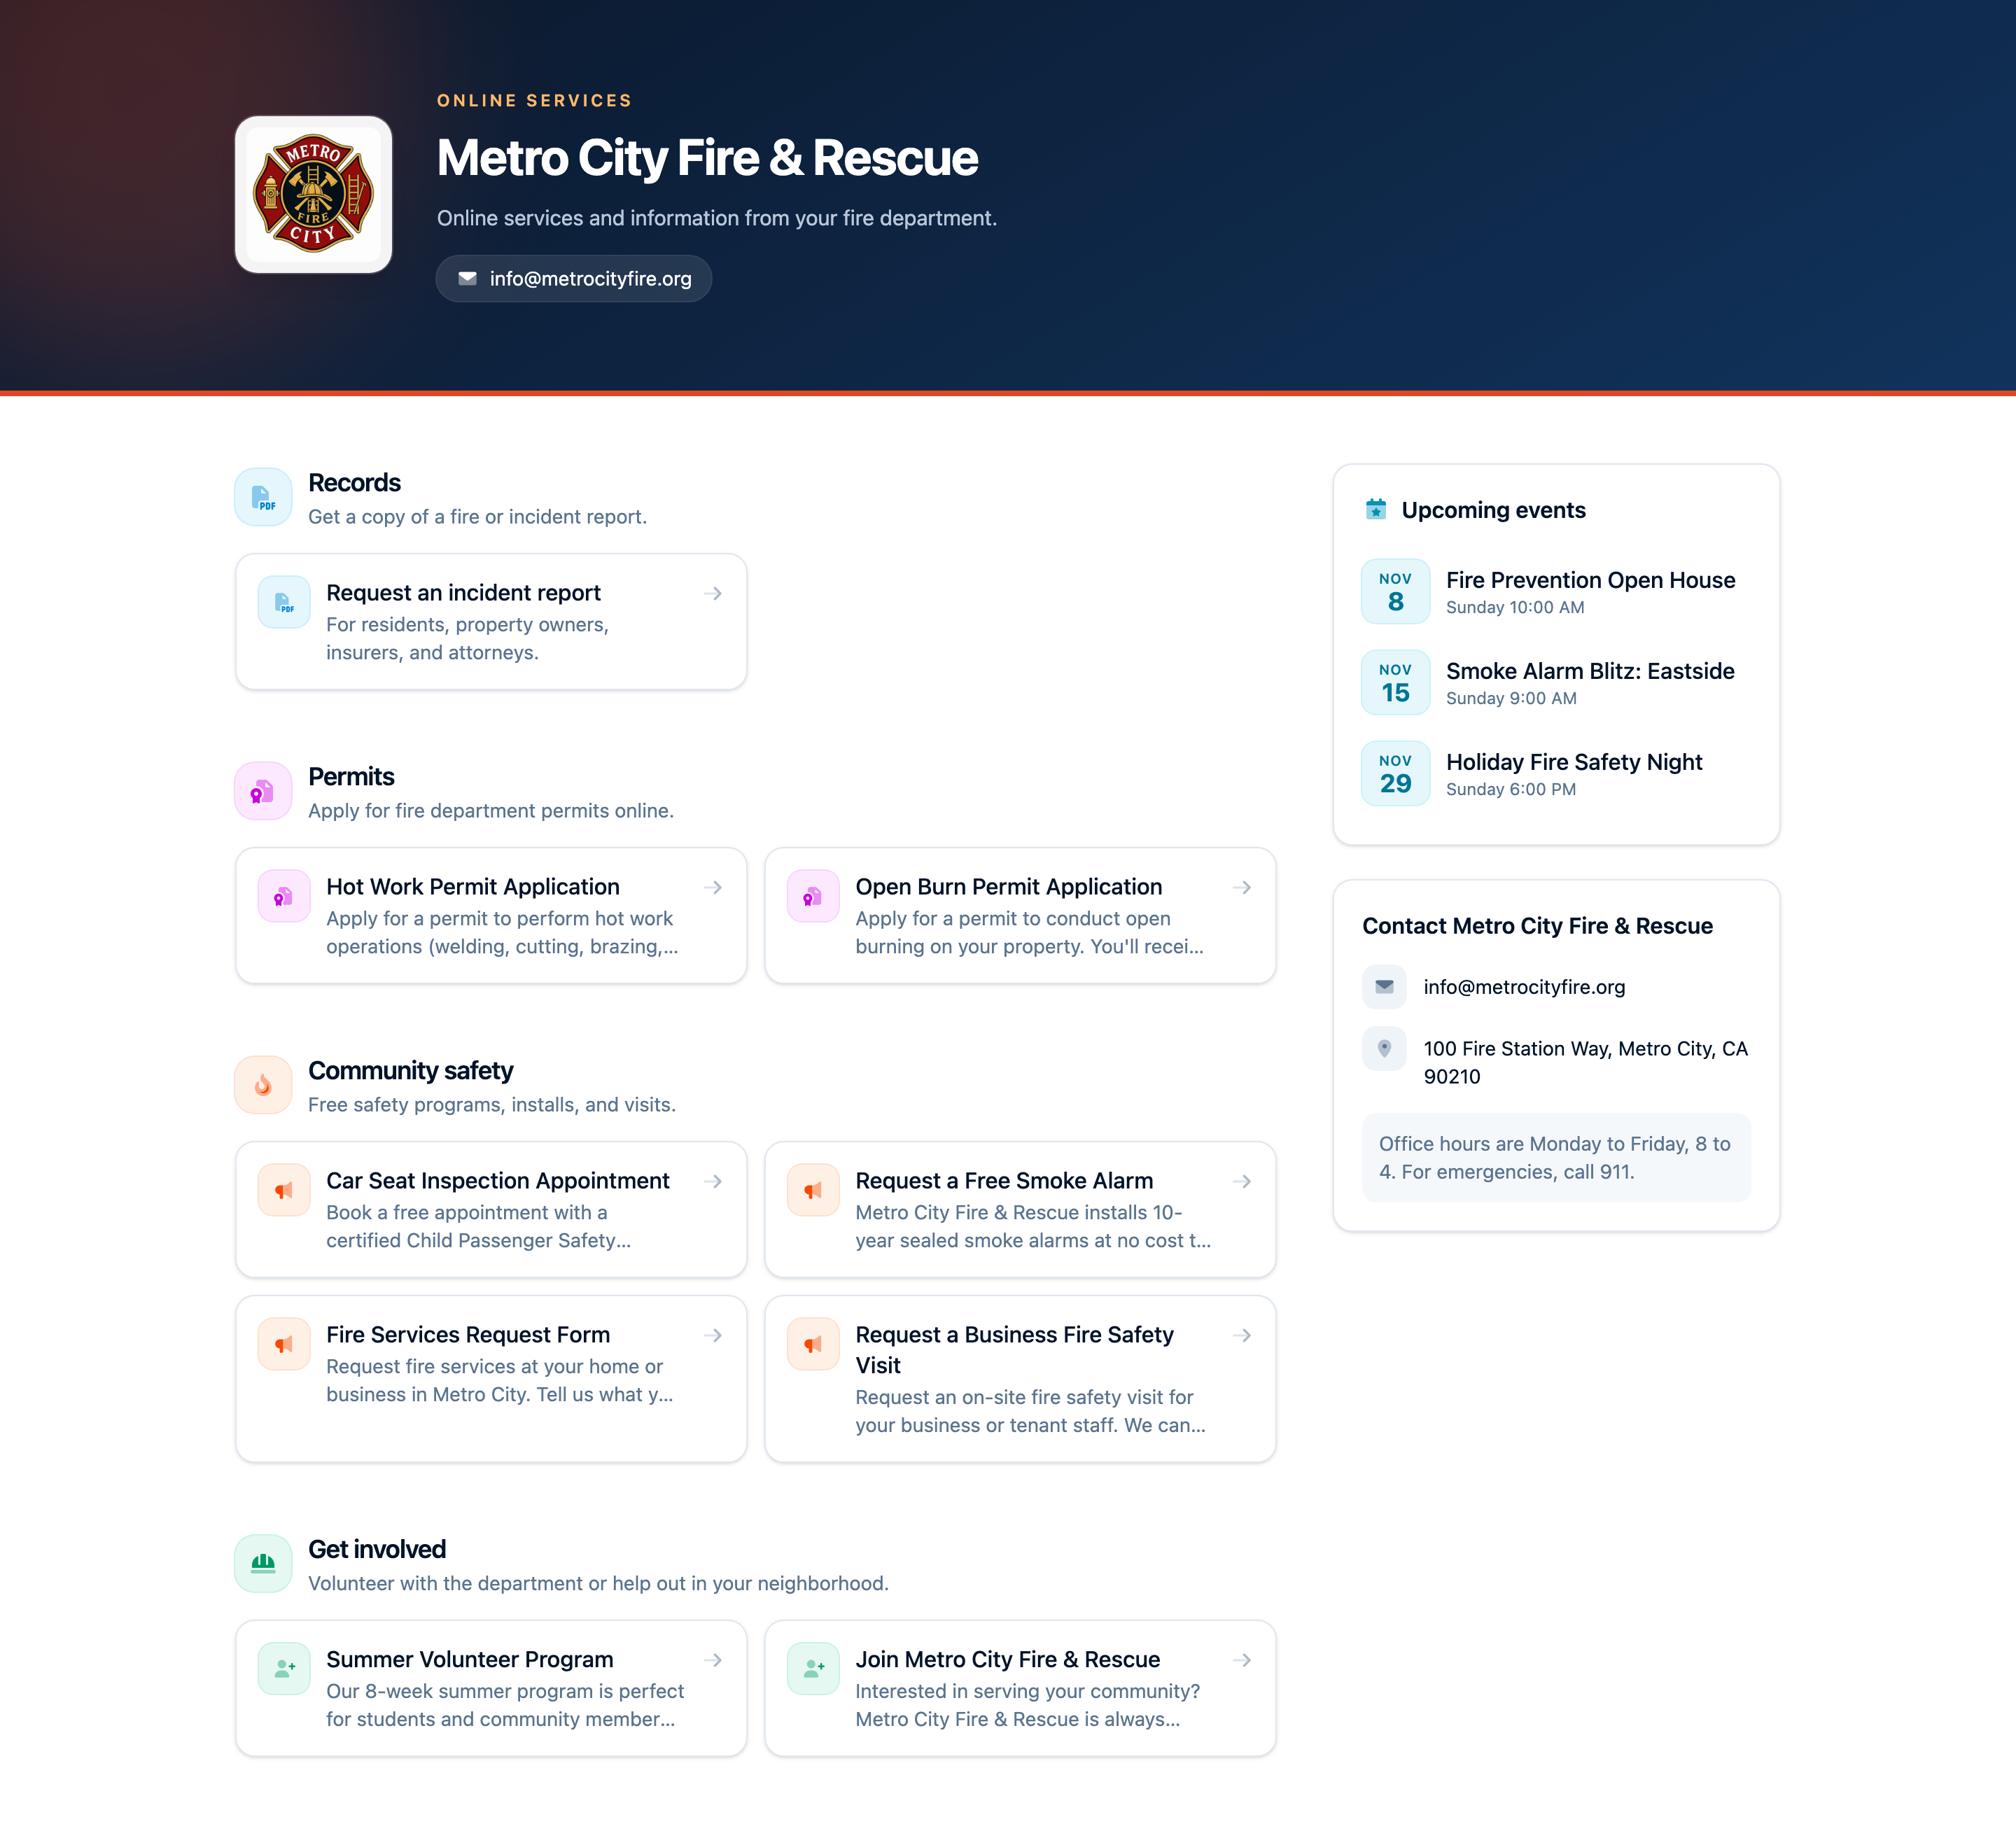
Your public portal is the page residents land on when they want something from your department online. It lives at one address, commandestablished.com/p/your-department, and it lists everything you currently offer in one place: incident report requests, permit applications, community safety programs, volunteer applications, Adopt-a-Hydrant, and your upcoming public events. It also shows how to reach you.
Put that one link on your website, your social media pages, and your station sign. As you publish new forms or turn services on and off, the portal updates on its own. There is nothing to edit by hand.
Claim Your Portal Address
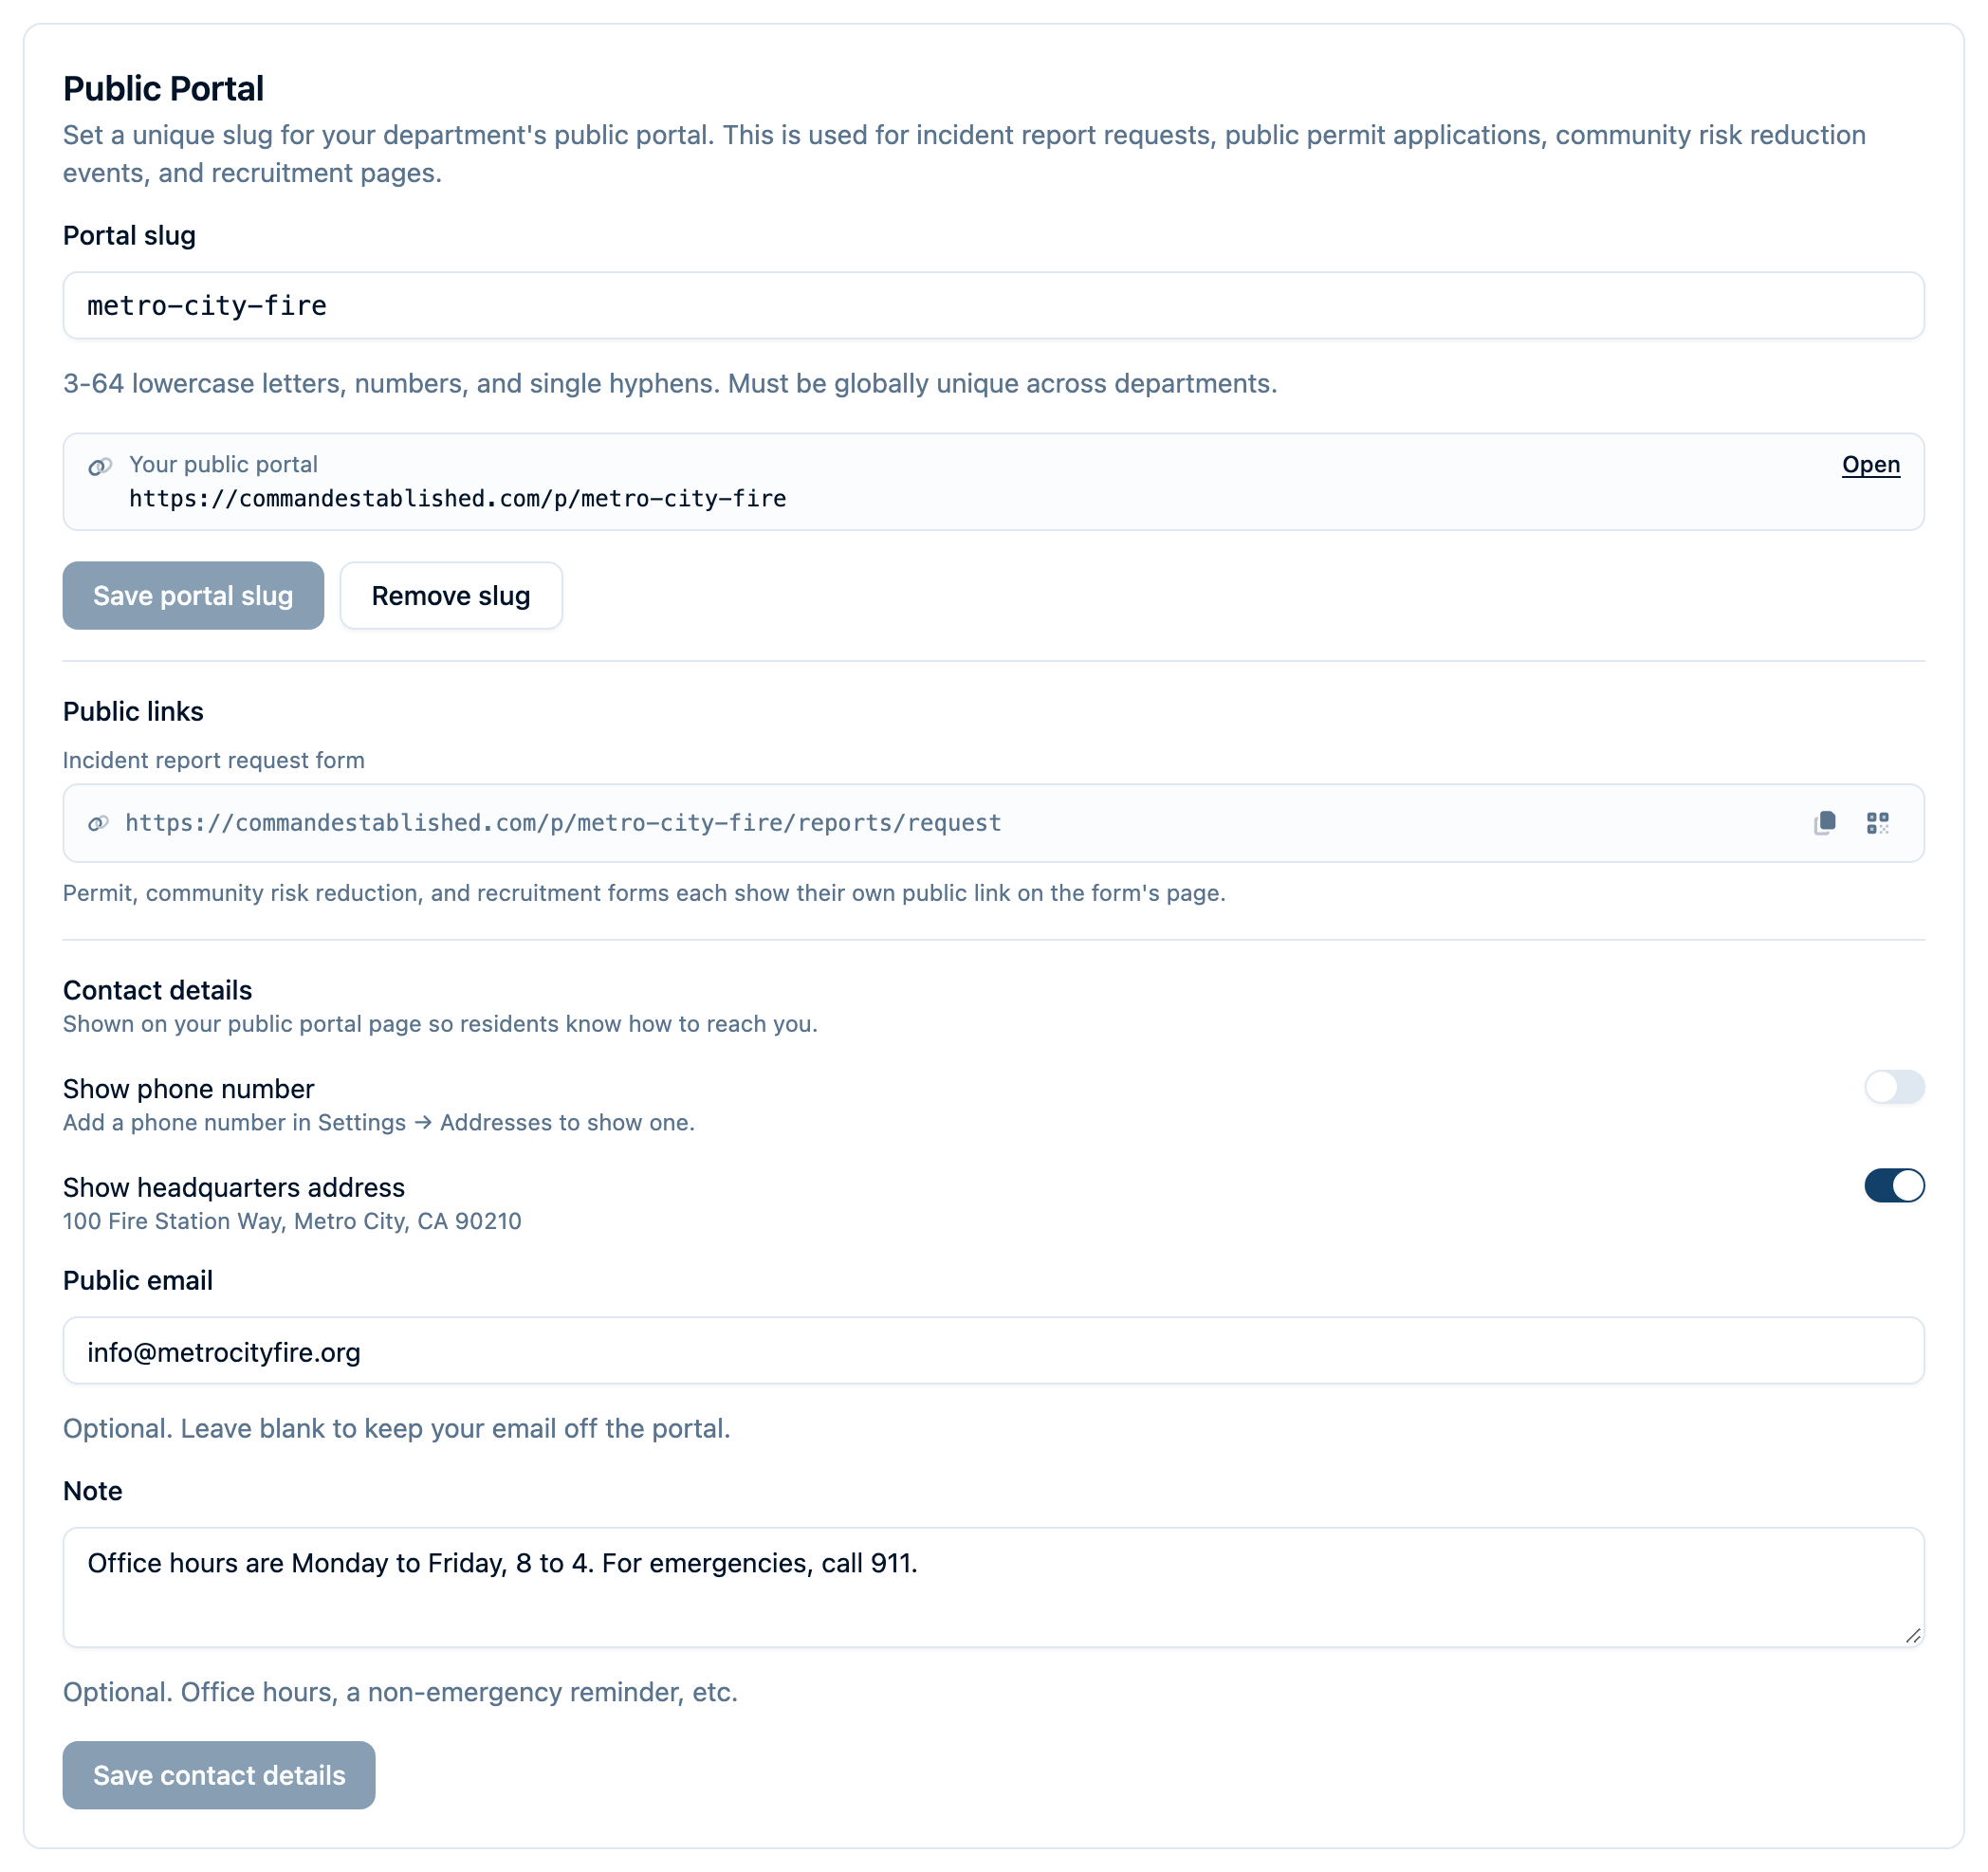
Go to Settings → Public Portal and choose your department's portal slug, for example metro-city-fire. The slug becomes the end of your portal address and the start of every public form link, so pick something short and recognizable. Use 3 to 64 lowercase letters, numbers, and single hyphens.
Once the slug is saved, the page shows your portal address with an Open link so you can see exactly what residents see.
Changing or removing your slug changes every public link. Links you've already shared, printed QR codes, and links on your website stop working. Removing the slug takes every public page offline until you set a new one.
What Residents See
The top of the portal shows your department's name and crest. The crest is your department logo. To change it, click the logo at the top of the Settings page. Below that, services are grouped by what a resident is trying to do:
- Records: request a copy of an incident report. Shown when Fire Report Requests is turned on in Settings → Modules.
- Permits: each published permit application form.
- Community safety: each published CRR request form, such as free smoke alarm installs, home safety visits, or car seat inspections.
- Get involved: each active volunteer application form, plus Adopt-a-Hydrant if you've turned it on.
A section only appears when it has something in it. If you offer nothing online yet, the portal says so rather than showing empty headings.
Next to the services, residents see your next few upcoming events: CRR activities that are published with a public event page and haven't been cancelled or completed. Each one links to its event page.
Why a form might not appear
The portal only lists things a resident can actually finish. If a form you expect is missing, check these:
- The form isn't published, or a volunteer application form isn't active.
- Its permit type or CRR program has been archived.
- Its permit type has "Requires linked location" turned on. Residents can't pick a linked location from a public form, so those permit forms aren't listed. Turn the setting off on the permit type if residents should be able to apply online.
- A volunteer application form has no starting status in its pipeline, so there's nowhere to file a new applicant.
- The module is turned off. Incident report requests need Fire Report Requests on, and Adopt-a-Hydrant needs both the Hydrants module and the adoption program on.
Publish Your Contact Details
The portal can show a contact card so residents know how to reach you. Set it up under Settings → Public Portal → Contact details:
- Show phone number: shows your department phone number. The number itself comes from Settings → Addresses.
- Show headquarters address: shows your headquarters address, also from Settings → Addresses.
- Public email: an optional address for residents to write to. Leave it blank to keep email off the portal.
- Note: optional text such as office hours or a reminder to call 911 for emergencies.
Nothing is shown until you choose it. If you haven't entered a phone number or address yet, the switch tells you where to add one. You can always switch a detail off, even after the underlying phone number or address has been removed.
The phone number and email also appear as buttons at the top of the portal, so a resident on a phone can call or email in one tap.
Find the Incident Report Request Link
The incident report request form has one link for your whole department. You can find it in three places:
- On the Report Requests page, just below the page title, with buttons to copy the link or print a QR code. Administrators also get a Settings button there for fees, accepted requesters, turnaround time, and your public-records statement.
- In Report Requests → Settings, under Public request form.
- In Settings → Public Portal, under Public links.

The link only appears while Fire Report Requests is turned on, because the form isn't available to the public while the module is off. If someone opens a report request link while it's off, they see your department's name and crest, a note that online requests aren't available right now, and a button to your portal's other services.
Permit, CRR, and volunteer application forms each have their own link and QR code on the form's page in their module. The portal links to all of them automatically, so residents can always start from your portal address.