
Inventory Management Best Practices for Fire Departments
From SCBA packs and thermal imagers to hose loads and medical supplies, fire departments manage an enormous amount of gear. Here's how to get it organized, tracked, and compliant — without turning it into a second full-time job.
Spreadsheets and clipboard checklists get departments by for a while, but they don't scale. They can't tell you when a hydrostatic test is coming due, which apparatus is missing required ISO-rated equipment, or how many N95 masks are left in station supply. And when the insurance auditor or ISO grader shows up, pulling together proof of compliance from scattered records is a scramble nobody enjoys.
Start Where It Matters Most
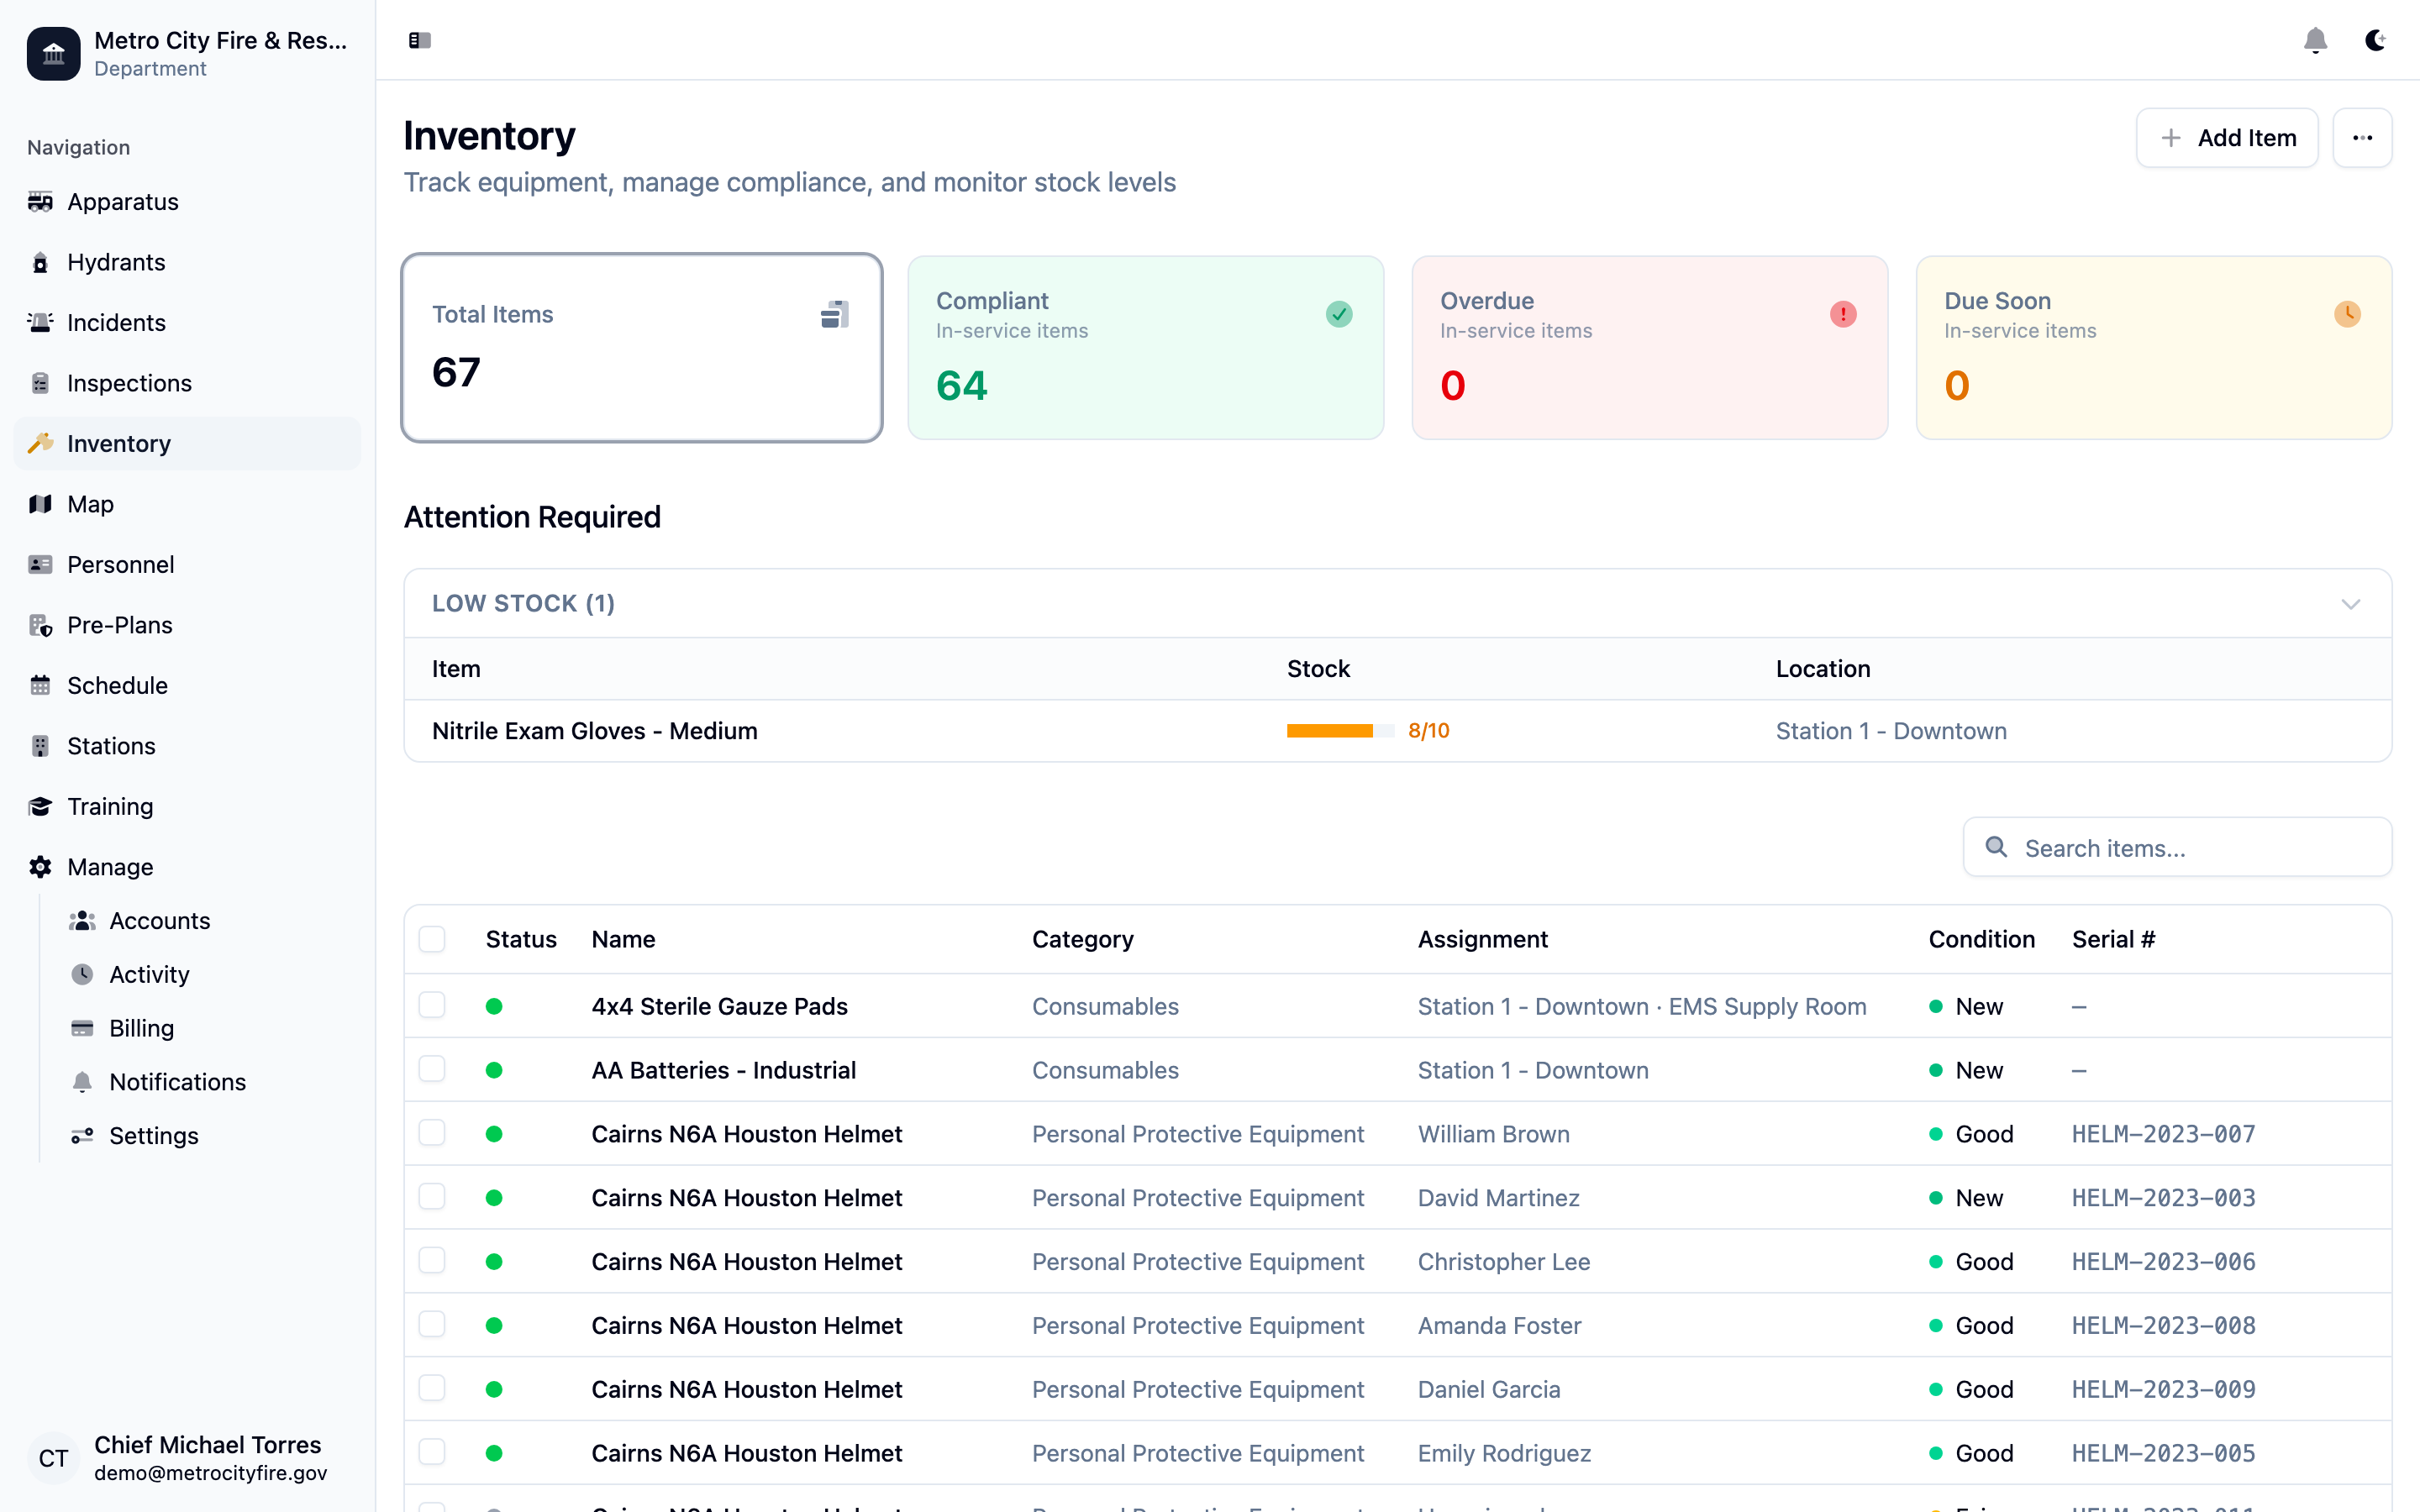
The biggest mistake departments make is trying to catalog everything on day one. The fastest path to value is starting with what matters most and expanding from there.
- Phase 1: Critical Safety Equipment — SCBA packs, cylinders, PASS devices, PPE. These have the strictest compliance requirements and the highest stakes if something is missed.
- Phase 2: Apparatus Equipment — Tools and gear on your rigs. Unlocks compartment-level tracking, apparatus load compliance, and ISO equipment verification.
- Phase 3: Station Inventory — Supplies, medical equipment, cleaning products, and station infrastructure items that round out the complete picture.
- Phase 4: Historical Records — Backfill key historical data — test dates, purchase dates, inspection records — to build a complete compliance timeline.
Categories and Locations
Command Established uses a two-dimensional system: categories define what something is, and locations define where it lives.
Category Hierarchy
Categories follow a tree structure that mirrors how fire departments think about equipment. Top-level categories like SCBA, PPE, Hose, Tools, Medical, and Communications break down into specific subcategories — SCBA into Packs, Cylinders, Masks, and RIT equipment.
Tip: This hierarchy powers filtering, reporting, and compliance tracking throughout the system. Filter by top-level category to see all SCBA items across your department, or drill into a subcategory to find cylinders due for hydro testing.
Locations: Apparatus Compartments and Station Storage
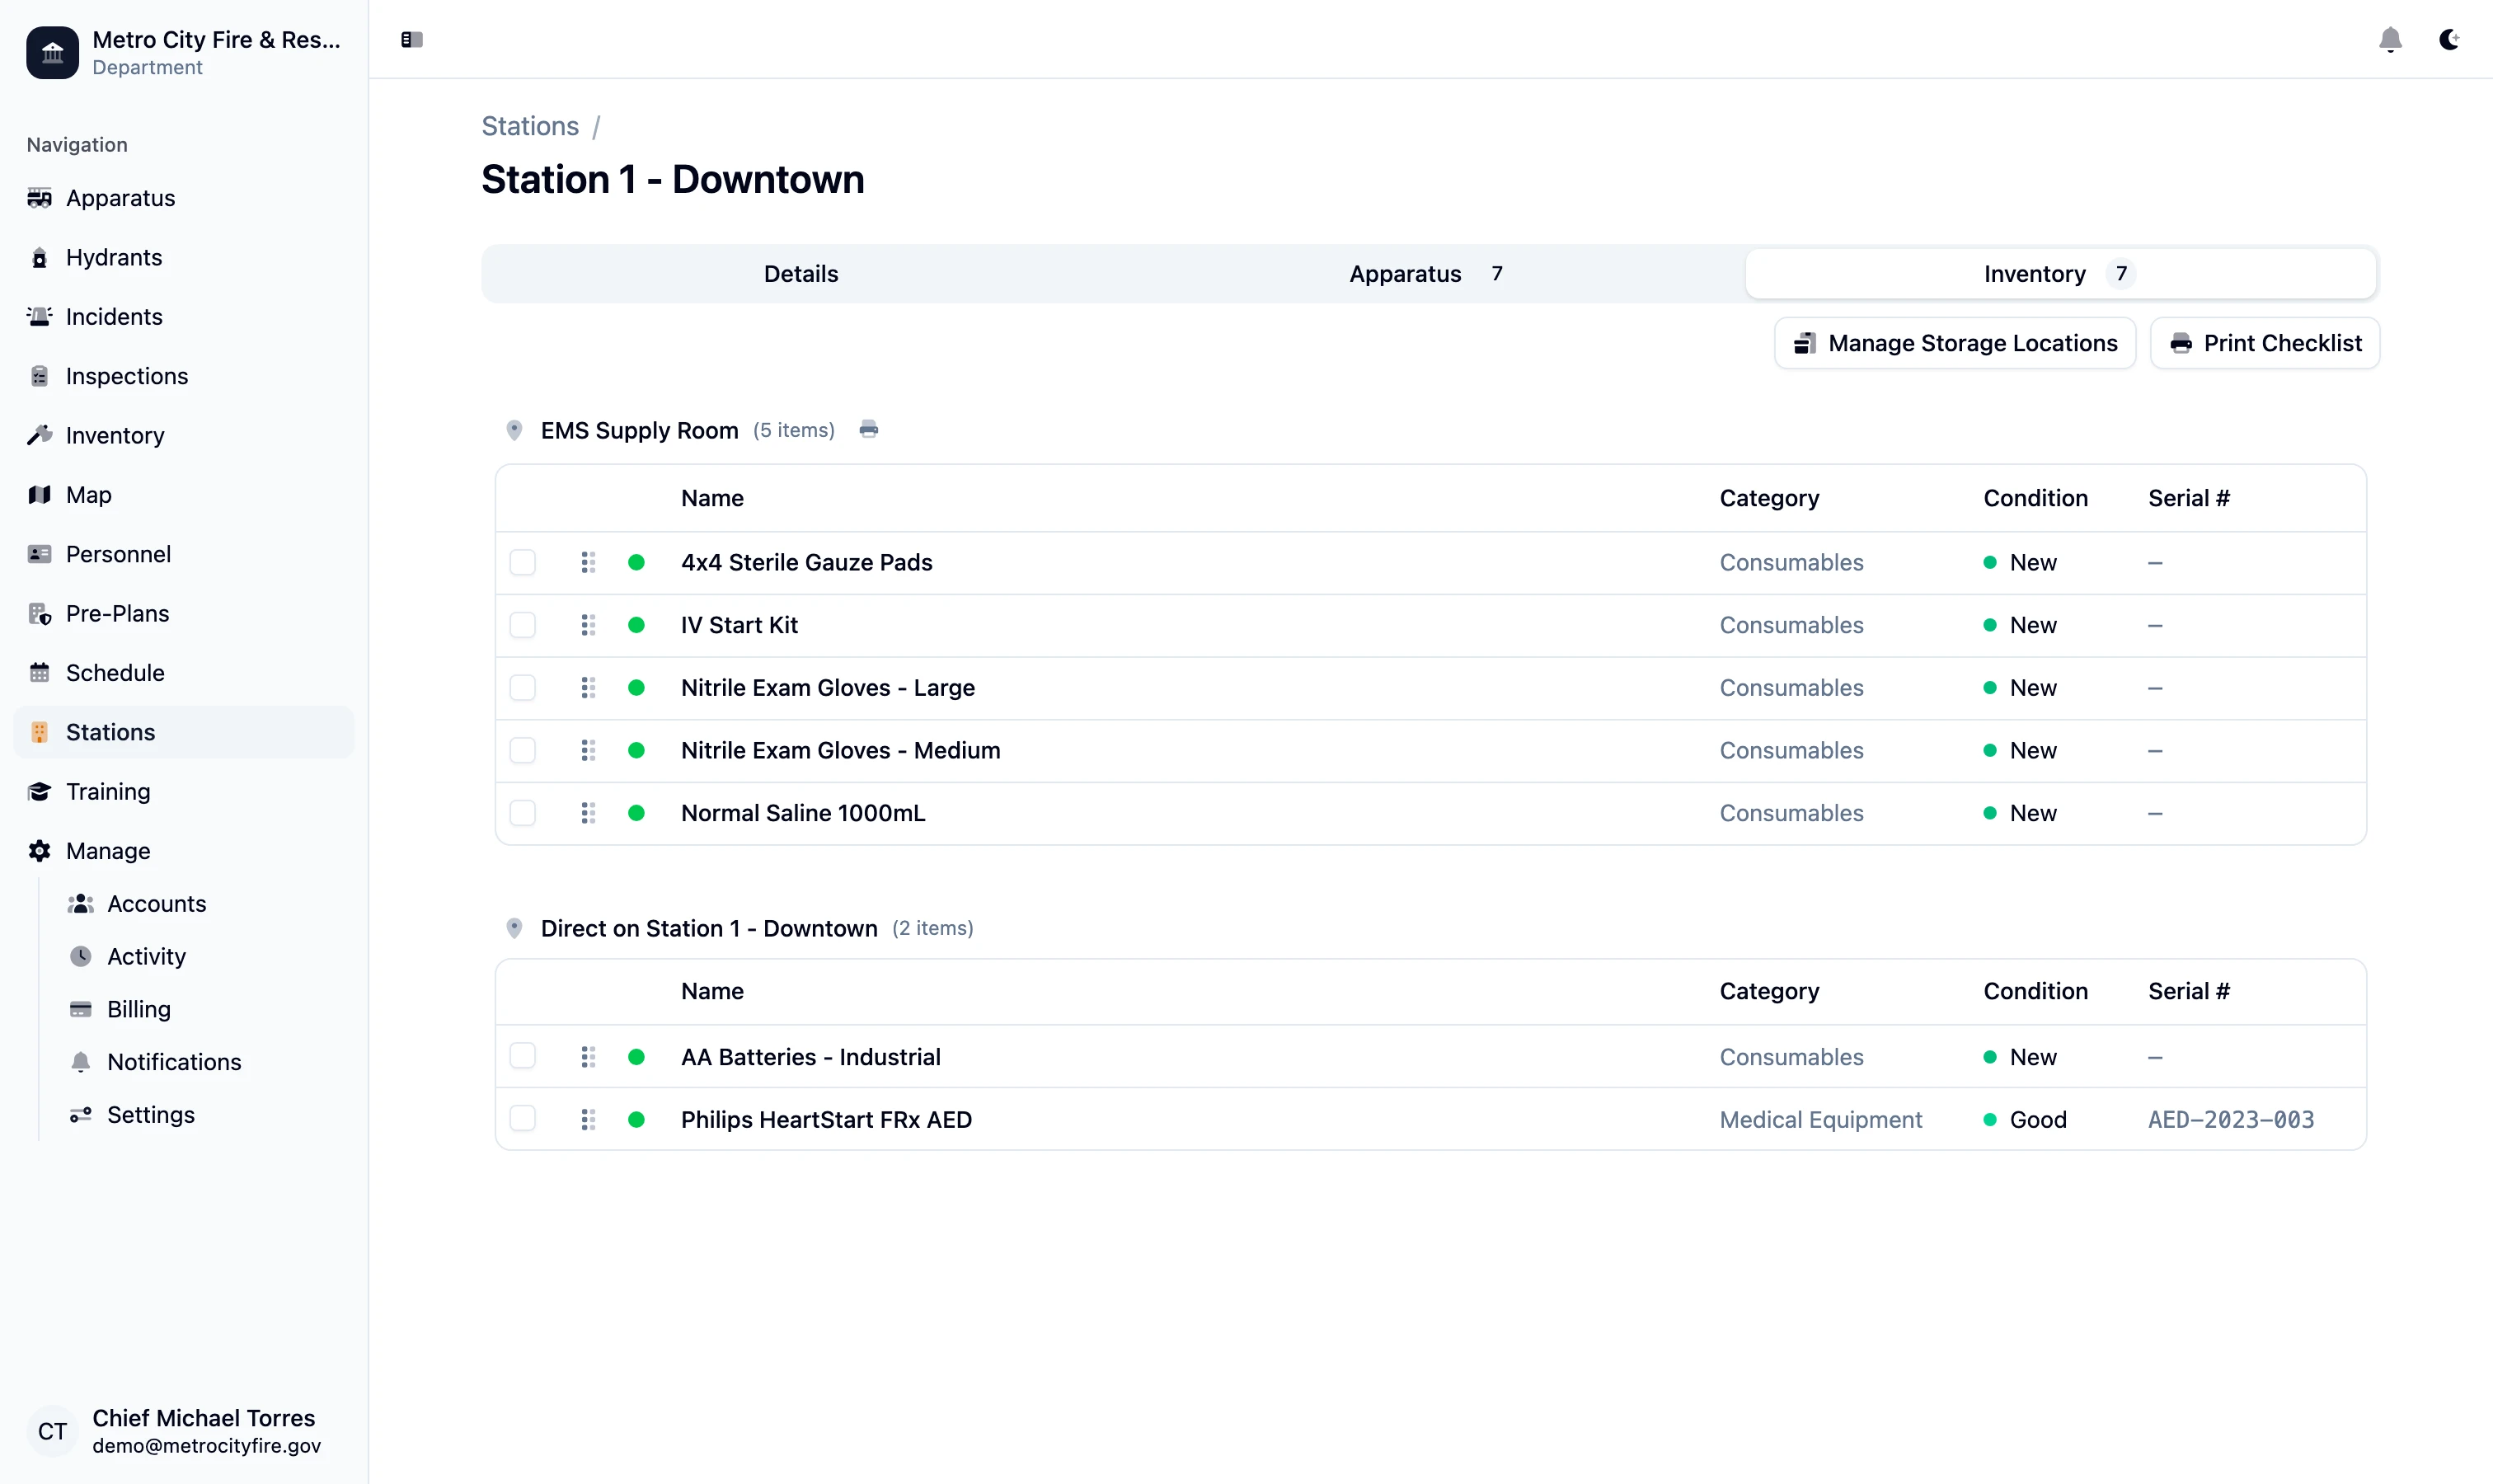
An apparatus has compartments — Driver Side 1, Officer Side 2, Crosslay, Cab — and each can be set up as a location. Station storage areas like supply rooms and workshops are separate location branches. This means you track not just that your department owns a set of irons, but that they live in the Driver Side 2 compartment of Engine 1.
Adding and Managing Items
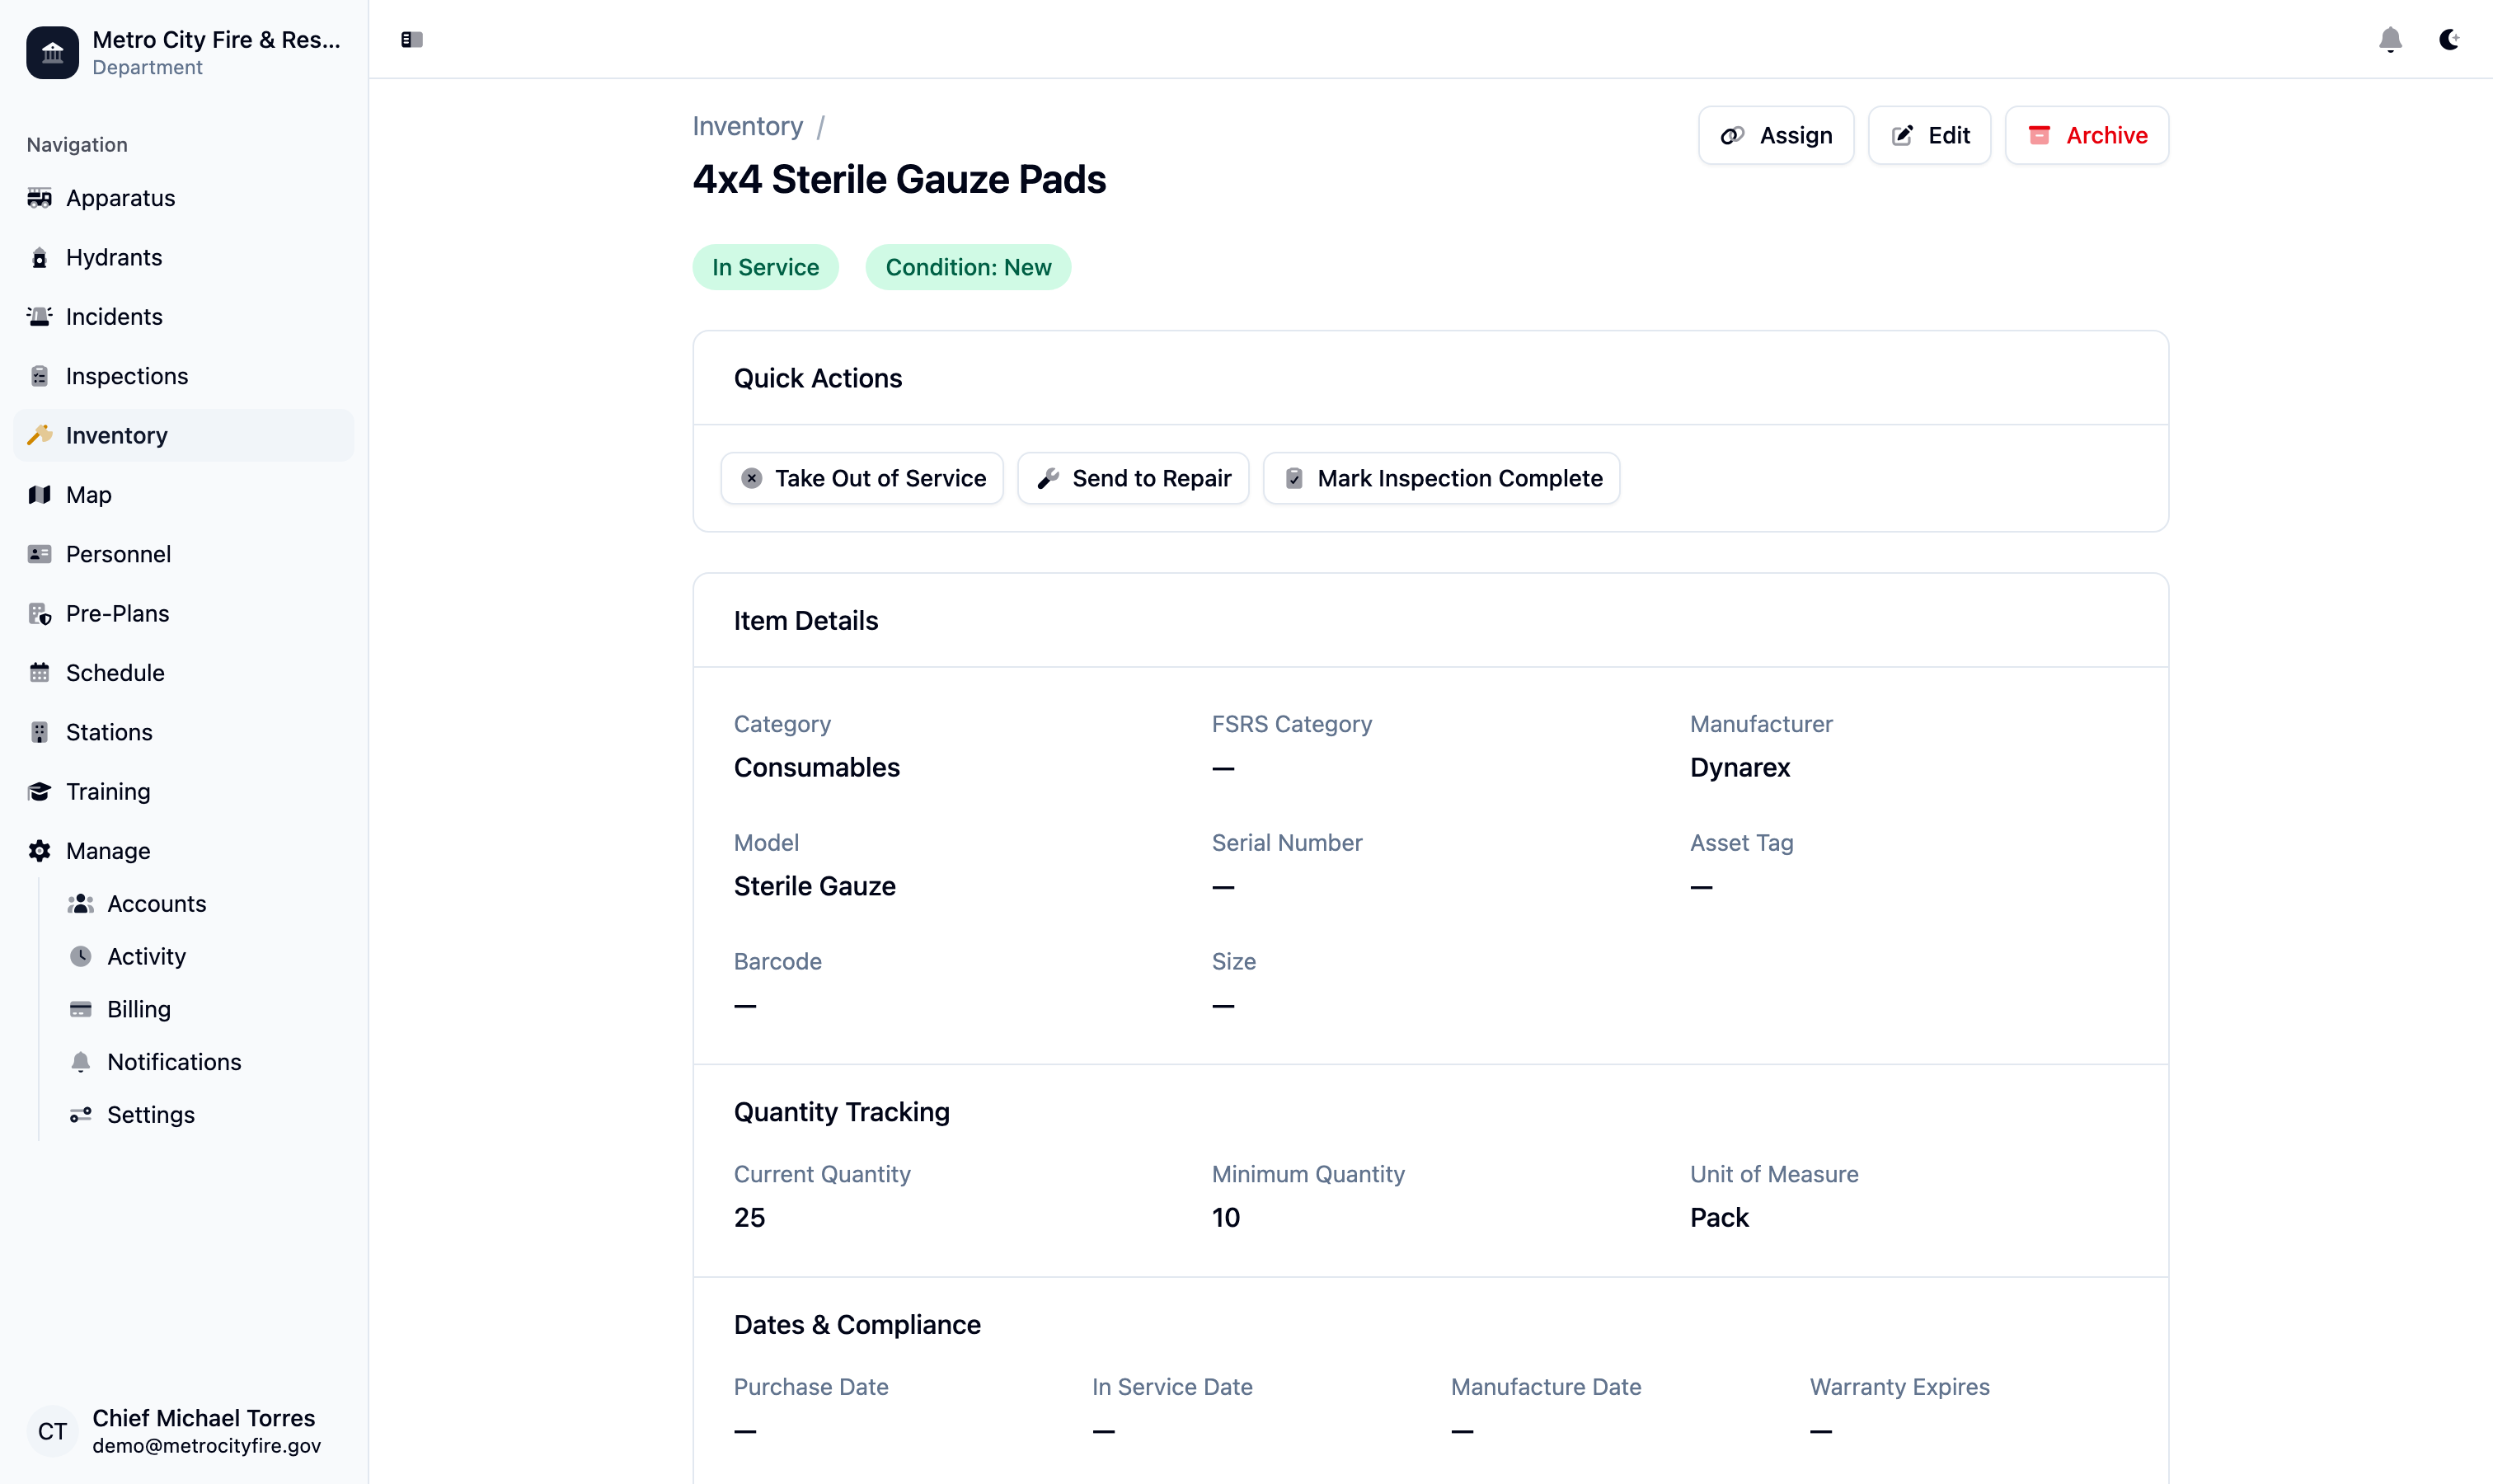
Every item has the basics — name, category, location, status. But the fields that make inventory management actually useful long-term are the ones departments often skip during initial setup.
- Serial Numbers & Asset Tags — Your unique identifiers. When you need to pull a specific SCBA cylinder for hydro testing, the serial number is how you find it.
- Purchase Date & Cost — Essential for capital replacement arguments and insurance questions about equipment age. Enter it now to avoid digging through purchase orders later.
- Manufacturer & Model — Useful for recall tracking, warranty claims, and ordering replacement parts. Pull a list of every affected item when a safety bulletin is issued.
- Warranty & Expiration Dates — The system tracks these and surfaces alerts as dates approach. A compliance essential for items with hard expiration dates.
Naming Conventions
Consistency saves time. When three people add SCBA cylinders with three different naming styles, reports become unreliable. A good pattern is Manufacturer Model Description — for example, "Scott Air-Pak X3 Pro SCBA Pack" or "Akron Turbojet 1.5in Nozzle."
Photos
Attach photos to document condition, capture serial number labels, and create visual records for insurance. When a new firefighter joins and needs to identify equipment on an apparatus, photos are far more useful than text descriptions alone.
Equipment Assignments
Fire department equipment doesn't just sit on a shelf. It moves — between apparatus, stations, and personnel. Command Established tracks three types of assignments.
- Apparatus Assignments — Gear that lives on a rig. Assign a thermal imager to Engine 1 and it appears in Engine 1's equipment load — down to the specific compartment.
- Station Assignments — Items that belong to a location rather than an apparatus — the station's AED, workshop tools, day room equipment.
- Personnel Assignments — Gear issued to individuals — turnout gear, pagers, portable radios. When a member leaves, see everything issued to them that needs to be returned.
- Assignment History — Every assignment change is logged — who moved it, when, and why. Invaluable for tracking down equipment and understanding utilization patterns.
Tip: For mutual aid situations where equipment is temporarily loaned to another department, assignment tracking ensures you have a record of what went out and a reminder to get it back.
Items inside other items (kits and bags)
Some gear travels as a set. A chimney bag holds a brush, rods, and a mirror. A trauma kit holds a tourniquet, shears, and dressings. Each of those pieces is worth tracking on its own — the mirror gets broken, the rods get borrowed — but nobody wants to reassign four items every time the bag moves to a different rig.
Command Established handles this with containers. Mark the bag as a container, put the contents inside it, and from then on the bag is the only thing you move.
Making an item a container. When creating an item, check This item can hold other items (bag, kit, box). For an existing item, tap Edit on the Item Details card, check the box, and save — it isn't shown until the card is in edit mode. Only items with that box checked can hold contents, and you can't uncheck it while anything is still inside.
Putting an item inside. Open the item's assignment dialog, choose Inside another item, pick the container, and tap Save Assignment — closing the dialog before saving discards the pick. To store several items at once, select them in the inventory list, tap Assign in the bulk toolbar, choose Inside another item as the destination, pick the container, and tap Store Items — every selected item goes into that container.
Contents move with the parent. A contained item takes on its container's assignment automatically. Store the brush inside the chimney bag on Engine 1, and the brush shows as being on Engine 1 too. Reassign the bag to Engine 2 and everything inside it follows, with no extra steps. The bag's assignment history is the record of the move.
Taking something out. Reassigning a contained item directly — to a different rig, a person, or a storage location — pulls it out of the container. If you want to remove it without moving it, use Remove from Container in the assignment dialog; the item stays where the container was.
Where you'll see it. The item page shows a Stored inside link on contained items and a Contents card on containers. Compartment inspection cards and the printable inventory checklist show contents indented under their container, so the rig check reads "chimney bag — brush, rods, mirror" the way you'd expect.
When several containers share a name. Departments that run one chimney bag per engine end up with three items all called "Chimney Bag." The container picker shows a second line under each name with where it's assigned — the apparatus, station, or person, plus the storage location or compartment when set — and its serial number or asset tag as a tiebreaker. The search box matches that line too, so typing "Engine 1" narrows the list to the bag on Engine 1. Once you pick, the closed picker echoes the assignment so you can confirm you grabbed the right one.
Limits. Items can be nested at most three levels deep (a pouch inside a case inside a bag is fine; a fourth level is rejected — the compartment or rig the outermost bag sits in doesn't count), an item can't be stored inside itself, and a container can't be archived while it still has contents.
Tip: Mark the bag as a container first. The new-item form can't place an item inside a container directly (its initial assignment is a person, apparatus, or station only), so create the contents, then store them in the bag with the bulk Assign workflow or each item's assignment dialog. Older items from before this feature aren't flagged as containers — check the box on their details card before trying to store anything in them.
Duplicating items
When you buy a dozen of something, enter it once and duplicate it. Open the item, choose Duplicate from the actions menu, and set Number of copies (up to 50 at a time). The copies inherit the original's descriptive fields — manufacturer, model, category, size, condition, and so on — so fill those in before you duplicate. Not copied: the per-item identifiers (serial number, asset tag, barcode, SCBA cylinder and regulator serial numbers), photos, and any item-level compliance settings (compliance standard, maintenance interval); add those afterward.
The dialog also has an Initial assignment picker. It defaults to where the original lives — its container if it's stored inside one, otherwise its direct assignment — and whatever you choose applies to every copy: a person, an apparatus (down to the compartment), a station storage location, another container, or Unassigned. If the copies are each headed somewhere different, choose Unassigned here and place each one on the review screen that follows — that way each copy's history shows a single assignment rather than a move from the original's location.
The copies are created as soon as you confirm the dialog; the bulk review screen that opens next is for editing them. It lists every copy with its own Assignment column. Change any row individually, or use Set all... in the column header to send every row to one destination. Save All writes only the rows you changed and reports success or failure per row, so one bad row (say, an apparatus that was archived while you were working) doesn't hold up the rest — except that a blank name stops the save entirely until you fill it in. If you leave the page without saving, the copies still exist; only your review edits are lost.
Inspections, Testing, and Maintenance
For a step-by-step guide with inline UI examples, see Inventory Compliance: Inspections, Testing, and Next-Due Dates. It covers single-item records, batch inspection events, SCBA hydro and flow testing, and exactly how saved results affect the item's next deadline.
Set the Right Schedule
Use the applicable equipment requirements, manufacturer instructions, and your department's procedures to establish inspection, testing, maintenance, and retirement dates. Testing profiles suggest intervals, but you should review every Next Due Date before saving. The default-interval reference explains when the profile or category supplies that suggestion.
Recording Inspections
Open an item's Inspections & Tests card and select Record for a single inspection or test. For a testing day or vendor visit covering several items, use Inventory → Inspection Events → New event. Each item keeps its own result, notes, documents, and next-due date.
Planning Follow-Up
Review Overdue, Due Soon, and Items Due in Inventory, then assign the work through work orders. Recurring work orders can schedule repeat tasks; their deadlines also appear in the Calendar module. Inspection events record work already performed, so use a work order when planning a future testing day.
Failed or conditional result? Save the result, review the follow-up date, and use Create Work Order to open and submit the corrective work. Recording a failure does not automatically create a work order or change the item's service status. Update the status yourself when needed.
SCBA Program Management
SCBA is one of the most compliance-intensive areas of fire department inventory. Between packs, cylinders, masks, regulators, and all the associated testing requirements, SCBA programs generate significant recordkeeping.
- Component Tracking — Track each SCBA component individually while maintaining relationships. A pack has its serial number, the attached cylinder has its own testing schedule, and the assigned mask has its own fit test records.
- Hydrostatic Testing — The system tracks the last test date, calculates the next due date, and surfaces cylinders approaching their deadline. Track vendor information and return dates through work orders.
- Fit Testing Records — Use the member's Fit Tests tab for personnel fit testing, including the mask information. An inventory test entry does not replace a personnel fit-test record.
- Complete Records Package — Pack inspections, cylinder test dates, fit testing, and maintenance history — all assembled automatically from data recorded during normal operations.
The Compliance Dashboard
The compliance dashboard aggregates alerts and status information from across your entire inventory into a single view, organized by urgency.
- Overdue Inspections & Tests — Items past their scheduled inspection or testing date. Your highest-priority items — compliance gaps that need immediate attention.
- Upcoming Due Dates — Due Soon covers the next 30 days in the inventory compliance summary and alerts.
- Expiration & Retirement Dates — These deadlines are tracked separately from inspection and testing dates. Department-wide inventory compliance counts in-service and on-loan items; review out-of-service equipment through its status and work orders.
- Low Stock Alerts — Consumables below their minimum threshold. Prevents the "we're out of nitrile gloves" scenario every station has experienced.
Tip: Make the compliance dashboard part of your officers' weekly routine. A five-minute review each Monday catches issues while they're still easy to address, rather than discovering a stack of overdue inspections during an annual audit.
ISO/FSRS Equipment Compliance
For departments that participate in ISO grading or FSRS evaluations, equipment tracking directly affects your community's insurance rates. Command Established makes it straightforward to verify compliance before the grader arrives.
- ISO Equipment Categories — Tag inventory items with ISO-relevant categories — hose, nozzles, SCBA, ladders, appliances — to generate reports showing your equipment against ISO requirements.
- Apparatus Load Compliance — Compartment-level tracking feeds directly into ISO compliance. Verify that each apparatus meets equipment load requirements and identify gaps.
- Equipment Checklists — Create apparatus-specific checklists that map to ISO requirements. Completed checklists become compliance documentation.
- Compliance Reports — Generate reports showing apparatus loads against requirements with pass/fail indicators — ready for the ISO grader or insurance inspector.
Bulk Operations and Getting Data In
Building an inventory from scratch can seem daunting. Command Established provides tools to make initial data loading manageable.
- CSV Import — Have existing inventory data in spreadsheets? The CSV import tool maps your columns to Command Established fields and imports items in bulk — the fastest way to migrate from a spreadsheet-based system.
- AI Photo Scanning — Photograph equipment and automatically extract information — manufacturer, model, serial numbers — to pre-populate inventory records. Dramatically reduces manual data entry for initial inventory building.
- Bulk Updates — Update multiple items at once — change categories, update locations, or modify fields across a selection. Especially useful during reorganizations or when setting up a new apparatus.
- Scanning barcodes with the camera — A phone or tablet camera works as a scanner in a supported browser. See below.
Scanning barcodes with the camera
The scanner runs in the browser or the installed app — nothing to pair, no scan gun to buy. It needs a current mobile or desktop browser and a secure (https) connection; if the camera can't be used, the scanner dialog says so and you can type the barcode instead. It reads both the labels the system prints for you and the barcodes manufacturers already put on gear. Supported formats include Code 128, Code 39, Code 93, EAN-8/EAN-13, UPC-A/UPC-E, Codabar, Interleaved 2 of 5, GS1 DataBar, and the 2D formats QR, Data Matrix, Aztec, and PDF417. The viewfinder has a flashlight toggle and a zoom control (double-tap to zoom), which helps with small, dense serial labels on turnout gear.
There are two places to scan, and they do different things:
- Finding an item. On the inventory list, tap Find Item by Barcode, and point the camera at the label. When it matches, the dialog shows Item found; tap Go to Item to open the item's page. If nothing matches, you'll see "No item found with this barcode." Use this during rig checks, when returning gear, or any time you have the thing in your hand and want its record.
- Adding a barcode to an item. On an item's details card, open Generate barcode (or Print barcode if it already has one). If the item has no barcode yet, you can either generate a new one to print, or tap Scan existing barcode to read the label the manufacturer already applied — a Fire-Dex serial tag on a coat, for example. After the scanner reads it, tap Use Barcode, then Save Barcode (or Save & Print) — closing the dialog before that second step discards the scanned value. From then on, scanning that factory label finds the item. Use a label that's unique to that one item — a serial-number barcode, not a product UPC shared by every unit — because the system doesn't check for duplicate barcodes and a lookup on a shared code opens whichever matching item it finds first.
Tip: Hold the phone steady a few inches from the label and let it focus. Dense serial-number barcodes on fabric tags are the hardest read; use the zoom control rather than moving the camera closer than it can focus.
Getting Started
Ready to get your department's inventory under control? Here's a practical checklist:
- Set up your categories. Define a hierarchy that matches how your department thinks about its equipment. Start broad and add subcategories as needed.
- Define your locations. Set up stations, apparatus, and compartments. This structure is the foundation for tracking where everything lives.
- Start with SCBA. It's the most compliance-intensive category. Enter every pack, cylinder, and mask with serial numbers and test dates.
- Load your apparatus equipment. Work through each apparatus compartment by compartment. Take photos as you go.
- Set up recurring inspections. Use work orders to create recurring schedules for NFPA-required inspections and tests.
- Establish the weekly review habit. Make the compliance dashboard part of your officers' Monday routine.
- Expand to consumables. Once critical equipment is tracked, extend to supplies, medical equipment, and station infrastructure.
Frequently Asked Questions
How long does it take to set up inventory for my department?
Most departments can get their critical safety equipment (SCBA, PPE) entered in a single session. A complete apparatus-level inventory typically takes a few days of focused effort. The phased approach means you start getting value immediately rather than waiting for everything to be entered.
Can I import inventory from our existing spreadsheets?
Yes. The CSV import tool lets you map your spreadsheet columns to Command Established fields and import items in bulk. This is the fastest way to migrate from an existing system.
How does inventory tracking work with work orders?
Inventory items can be linked to work orders for maintenance, repairs, and inspections. After saving a failed or conditional result, use Create Work Order, review the details, and submit it. Completed work orders become part of the item's maintenance history.
Does Command Established track NFPA compliance automatically?
The system tracks the dates you enter, suggests next dates for recorded work, and surfaces approaching or overdue deadlines. It does not determine that every required test has been entered or passed: an item with missing dates can appear compliant. See how next-due dates work for the calculation and update rules.
Who can manage inventory items?
Any member with appropriate permissions can view, add, and manage inventory items. See Understanding Permissions & Groups for details on how roles work.
Can I track equipment across multiple stations?
Yes. The location and assignment system tracks equipment across all your stations and apparatus. When equipment moves between stations or rigs, the transfer is logged in the assignment history.
Our quartermaster tracks a chimney bag with a brush, rods, and a mirror inside. Do I have to reassign each piece when the bag moves?
No. Mark the bag as a container (check This item can hold other items on its details card), then store the brush, rods, and mirror inside it using Inside another item in each one's assignment dialog — or select all three, tap Assign in the bulk toolbar, and choose Inside another item. From then on, only the bag gets reassigned; everything inside it follows automatically and shows up indented under the bag on the compartment inspection card. See Items inside other items.
We just bought 12 identical portable radios, one for each rig. What's the fastest way to enter them?
Enter one radio with the manufacturer, model, and category filled in and assign it to its rig, then choose Duplicate from its actions menu and set the number of copies to 11. On the bulk review screen that follows, use the Assignment column to point each copy at its rig (and compartment), add each radio's serial number, and Save All. If all 12 were going to the same place, you'd set it once in the Initial assignment picker instead — that picker only places the 11 copies, so the original still needs its own assignment. See Duplicating items.
We have three items named "Chimney Bag." How do I pick the one on Engine 1 when storing something inside it?
The container picker shows a second line under each name with the container's assignment — apparatus, station, or person, plus the compartment or storage location — and its serial number or asset tag if the assignments match too. Type "Engine 1" in the picker's search box and only that bag remains. After you choose, the picker echoes the assignment so you can confirm before saving.